Buttoned up

Buttoned up

If there’s one problem we all share – no matter which harp we play – it’s replacing strings!  I don’t know anyone who springs out of bed of a morning and cries, “I sure hope a string broke in the night so I can put on a new one!”

Nope, no one I know.  You?

Like you, I know that with practice the knots get easier, string ends are less likely to spring from your fingers just as you place them, knots don’t pull through as often, and that eventually there’s exactly the right amount of slack for the wind. I know all those things are true. 

But I also know that, no matter how much I do it, I have yet to come to love replacing strings.  So, I’m happy for anything that would make it easier.  One of you asked me about this, so let me expound.

I LOVE STRING BUTTONS!

You might have seen them.  You might have heard me go on and on about them already.  But you might not have given them a try yet. 

String Buttons are made by Dusty Strings.  Here’s what they look like (photos patently stolen from the Dusty website).  I know, they don’t look like much.  In fact, they look like you got them at JoAnn Fabric.  Really, they look like you reached into Johnny Cash’s button box.

You might think that I just love them because Dusty makes them.  But you’d be wrong.  I love them because they make life easier!  They don’t just remove the chore from replacing a string. They can be an important part of growing older with your harp.

Wait, what? Well, think about it as we become more experienced humans, things change.  String Buttons can help you weather the changes.  Whether you have poor acuity, or your vision is changing – you might find handling thin strings and bits of string ends to tie a knot is becoming more challenging (especially in low light).  Or you might find that your hands are not as flexible or as strong as they might have been so gripping the string and the string end in a knot might be harder than it was before.  Or you might have built up a dread of making knots over time and ongoing battles with strings not knotting up quickly. 

In addition, String Buttons are inexpensive.  They come in packets of 12 and are just over a dollar a piece ($13.95). I just tossed mine in my tuning package (where I have the string ends) so they are ready when I need them. 

I hope you check them out – let me know what you think.  You know I want to know so share in the comments!

My new favorite thing

My new favorite thing

Having a seat at just the right height is so important to being able to play comfortably, healthfully, and safely.  But it is equally important that the seat be comfortable enough to sit for as long as you need to be sitting at your harp.  And you need to be the right distance from the ground so that your legs and knees are comfortable at 90o angles.  You also need to have a seat that is lightweight enough to move, not only around the space behind the harp but also into and out of the car and wherever else you need to bring your harp and play. 

That’s kind of a tall order.  I have had an X bench since I started playing but they don’t seem to make that anymore.  It is perfect – the right height, relatively light weight and I have a carrying case so it’s easy to bring to gigs and workshops.

But when I have a lot of stuff to carry (like when I go to Ohio Scottish Arts School) it becomes a little bit of a liability.  A lot of other people have a bench that looks like mine so it could be easy to lose.  And it isn’t small (even when collapsed).  And if I have to carry my harp around the building (to move from room to room to teach or to join a session) then the bench is harder to bring along (and requires multiple trips).

So, as perfect as the bench is, it started to be not quite as perfect as I would like.  I was looking for another solution that was easier to carry and provided more flexible seat heights.

I found one! (yea amazon) I found a collapsible camping stool that can go from 2.3  to 17.75 inches high, weighs a little more than 2½ pounds, supports up to 400 pounds, comes in colors, and is less than $30.  When fully collapsed, it fits in the pocket of my harp case.  You can even get a cushion.  I sit on mine for a long time on teaching days and while you won’t find them in luxury seating, they do the trick and are relatively comfortable for gigs or competitions – or even long teaching days.   There are many versions available, but this is the one I got (I can’t vouch for the others):

https://www.amazon.com/Boreeman-Upgraded-Lightweight-Collapsible-Retractable/dp/B083945P76?pd_rd_w=HqvBr&content-id=amzn1.sym.c15e5526-d433-4ac0-a393-a3f3f7218fab&pf_rd_p=c15e5526-d433-4ac0-a393-a3f3f7218fab&pf_rd_r=RRPFB98B0MEEH0G6K87Y&pd_rd_wg=kYTWQ&pd_rd_r=1be9a080-1a1d-4e1c-bc30-94e7818abcb1&ref_=pd_bap_d_grid_rp_0_116_t&th=1

(Because someplaces have laws: Nope, no affiliate link, just a link. I’m sharing what I know.  This is my opinion; I’m not compensated for sharing it. But I did want you to know what I found). 

If you get one, let me know what you think – I’d love to hear about your experience!

Tune it – Now What?

Now that you know more about tuners that you ever wanted to, you might be wondering what you should be doing with the one you selected!  Because no matter how ritualized you make your tuning, in the end, you want to get to playing – so you might be wondering,

“I have a tuner…now what?”

Tuning your harpGood question.  Since tuning is pretty essential, people who’ve been at it a while might forget to initiate others into the mysteries of it all – like what you should do when you sit down to tune.

First, some ground rules:

  • There is no one way to tune. Just like there is no single way to play the harp, there are multiple ways to approach tuning. Play around with the suggestions here and find the approach that works for you.  Or hybridize them, or make up your own.
  • No matter how you go about the act of tuning, in the end, be focused on the goal – which is to have a harp that is in tune. Anything that pulls you away from that goal is not serving you as a musician.
  • It is a good idea to tune your harp with all the levers OFF – no matter to what scale you’re tuned. Tuning with the levers engaged doesn’t make a lot of sense – if the levers are doing their job, turning the pin to tighten or loosen the string will have to work against the lever which is designed to hold the string in place – tautly!  Just don’t. Take the levers off and then tune.

So here are some thoughts on the HOW of tuning:

  • The Linear Method* – Start at the bottom of your harp and tune each string, in order, until you get to the top. Yup, easy-peasy. There’s no getting lost or forgetting where you were.  And if you do get lost, as soon as you hear the string you think was next, you’ll have auditory proof that you’re right (or not).  You can also go from top to bottom – there’s no magic in starting at the bottom, so it’s up to you.
  • The Linear Octave Method – Start at the bottom of your harp (my bottom string is a C) and tune that string. Then tune each successive string of that note up your harp (e.g., C6 – C5 – C4 – C3 – C2 – C1). Once at the top of your harp, go back to the bottom and do the next string (e.g., D6 – D5 – etc.).  Iterate until you get to C5) and you’re done.  As with the Linear Method, you could also start at the top and work your way down.
  • The Circle of 5ths Simple Method – This approach is a little more complicated in that it assumes you know and are comfortable with the complete Circle of 5ths**. In addition, you have to pay attention so you don’t forget where you are! Start with your favorite pitch (I start with Ab) (If that doesn’t mean anything to you, and if your harp is not tuned to Bb or Eb, start with A)( If that doesn’t mean anything to you, and your harp is tuned to Bb or Eb, let me know and I’ll address it another time!).  Tune all of the strings of that pitch, then move to it’s 5th and tune all those, move to its 5th and tune all those, etc. until you get back where you started. 
  • The Circle of 5ths Less Simple Method – This method is a little more complicated. Here you really have to pay attention so you don’t get lost! Again, start with your favorite string (I start with Ab3) (If that doesn’t mean anything to you, it’s the Ab above middle C).  Then tune the octave below it (for me, Ab4).  Next tune the octave above it (for me, Ab2), back and forth until all of the strings of that pitch have been tuned.  Then move to its 5th and tune all those, again going below then above, etc. around the Circle until you get back where you started.  This really does require that you pay attention because you have to remember what you have tuned and where you’re going (both direction and 5ths).
  • The Random Walk – I don’t recommend this approach, but I have seen some beginners use no pattern. They just pick a string and tune it and then go on to some other string (and it appears random to me, with no discernable pattern). This really would take a great deal of concentration and it’s likely that you’ll miss a string (or 6).  But I’m not going to tell you not to do it this way – as long as when you’re finished your harp is actually in tune!

Since you might ask, my favorite way to tune is the Less Simple Circle of 5ths Method.  I like it best because everything about it helps me tune – tuning the strings against each other helps me hear them better, using the Circle makes harmonic sense, and for me, not going straight up an octave helps me focus more.  But to be honest, I use all these approaches at various times, depending on the circumstances.  The best method is the one you’ll actually use!  In addition, even the most complicated approach becomes easy if you practice doing it!

Additional Thoughts

Remember there’s more to tuning that slavishly adhering to the tool. Your tuner is not smart. And while it “listens” it doesn’t “hear”!  So, when I have “finished” tuning, I have an additional step to hear that my harp is in tune.  I use this step to correct tuning that might be off.  There are a couple of ways to do it:

  • Play octaves – play a 2 handed one octave scale of octaves from the bottom to the top of your harp. You know how to do this, you learned when you were first playing the harp – play the lowest octave in the left hand (e.g., C6 and C5) and the next higher octave in the right (e.g., C4 and C3) and play a scale straight up until you get to the top of your harp. Listen to what’s coming out of your harp and fix any notes that aren’t sweet. 
  • Play triads – just like above but with triads rather than scales. I like this method best because it really helps me hear when a note is not right. Sometimes, that note will have read right on the tuner and sounded good in the octaves, but played against its 5th (or sometimes its 3rd) then I can hear that it’s just not quite right.  The other advantage is that I can quickly tell exactly which string isn’t right (not just which note) so I don’t have to guess or redo them all (it’s not all the Bs, it’s just B3, for example).  And it’s typically not out by, much so I can correct it fairly easily.

Handy hint – harps are built to be resonant. I place my hand flat against the lowest strings when I’m tuning the middle (remember, I usually start in the middle) – this way the tuner (and my ear) hears the string I’m playing. Otherwise, those lower strings are resonating sympathetically and the tuner hears that, but since, at that point I haven’t tuned those lower strings yet, what the tuner hears might lead me astray.  Then my tuned string is not actually as well tuned as I think and I will have to go back and retune it after I’ve finished tuning – how pointless is that!?!

How do you go about tuning?  Do you have another approach?  Anything that just really doesn’t work?  Let me know in the comments!


* I’ve made up these names, they aren’t “official” but feel free to use them 😉

** Whether you use this method of tuning or not, you need to know and be comfortable and facile with the Circle of 5ths – it’s something we use a lot!

Tune it

Last week after I exhorted you to tune every day, you asked about tuners – good question!

A tuner is certainly an important tool.  Unless you are born with perfect pitch, you’ll need one (and only about .0001% of the population does – that’s only about 775,000 people in the world!).  But a quick internet search for tuners may set your head spinning – there are so many, and they are all shiny, and they all do different things, and are they even right for the harp?!

So, this week, a little walk through the veritable Candyland of tuner types.  Hopefully this will help you decide which one is right for you.  We should start with the (boring but required) caveats – all of this is my opinion,  If you click on a link and buy one, I won’t get anything and I have no endorsement arrangements with any organizations (because I’m an idiot and I don’t make any money by “influencing” you!). 

Tuners are simply tools.  They range from simple and old school to amazingly complicated and precise.  I have tried here to cover the basic types.  I have included some to improve your knowledge even though you are unlikely to need or want them.  Here goes.

First, you DO need a tuner of some kind.  You will, of course, also use your ears, but since the pitches of the notes are mathematically related to one another, some level of precision is needed.  When you are tuning, you will consult with the tool but you will also want to hear that your harp is in tune – that your octaves are aligned and that you are getting harmonics where you expect them. 

Second, no matter which tuning tool you select, you will get better, faster, and more precise if you practice using it. That tuning every day thing will really help with that.  In addition, the more you tune your harp, the better it will stay in tune.  Yes, this is an infinite loop but it ensures you get better at it!

The first tuning tool you could use is a Tuning Fork like this one.  Definitely old school.  Also, it’s a tuning fork not a pitch fork!  You can buy them at the behemoths or at a music shop.  For harps tuned to C, F, or other major scale that keep the A string open, get a 440Hz fork (because they do, in fact, come in pitches) (Note that if you are tuned to Eb, you will want to get a G# like this one because you’ll want to tune with the levers off).  I’d suggest the ones from a music shop because they have the rubberized handle which lets the fork vibrate while you hold it without impacting its frequency.  To use the tuning fork, strike the tines on your arm or leg and then hold the base (the single end) to the sound board.  You’ll hear the reference pitch emanating from the soundboard.  Now play A3 (the A above middle C) and tune the string until you only hear one sound.  If you can hear two separate tones, the string is not in tune.  Once that string is in tune, then tune all the other A’s to A3.  Then you can use the Circle of 5ths to tune the rest of the harp.   

  • Benefits of the Tuning fork –
    • Works in any light
    • Needs no batteries
    • Lightweight, sturdy, and easy to carry
  • Drawbacks –
    • Only as accurate as your hearing and discipline
    • Difficult to use in a noisy environment (like with other instruments also tuning).
    • Significant learning and practice curve

The second tuning tool you could use is the Strobe tuner like this one.  Honestly, I have seen these but have never used one.  They are an electronic tuner which displays the difference between the reference frequency (what the note should be) and what you’re playing.  They are a “gold standard” for tuning. They are scary very accurate.

  • Benefits of the Strobe tuner:
    • Accuracy!  More accurate than any other tuner (likely more accurate that you can hear)
    • Easy to determine if you’re in tune and if your harmonics are in (or out) of tune
    • Easy to see the display and what’s going on
    • Easy to use in a noisy environment
  • Drawbacks –
    • Expensive (even the smaller ones)
    • Challenging (if you don’t fully understand how it works, you’re not easily going to find another harper to explain it to you)
    • High precision can lead to “chasing” the pitch up and down around the center

Third we have Chromatic tuners.  This is probably the most prevalent type of tuner you’ll see at any harp event.  Chromatic tuners allow you to tune your strings to the closest note of the twelve-note chromatic scale (think going up the piano playing C – C# – D – D# – E – F – F# – G# – A – A# – B – B# – c).  These are called semi-tones.  This allows you to tune to whatever major scale you happen to tune to (C, F, Eb, or whatever you have chosen). 

There is the handheld.  This is probably the type of tuner you have.  They come in a lot of forms but most of us are familiar with the Korg like this one.   There is a more complicated Korg like this one

  • Benefits –
    • Inexpensive
    • Easy to read
    • Easy to use
    • Can be used in noisy environments if include a pick up (a small microphone you plug into the tuner like this one)
  • Drawbacks –
    • Battery powered
    • Likely to break if you drop it

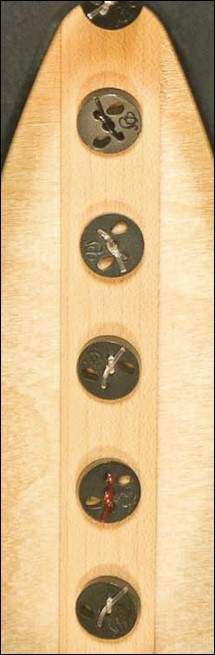
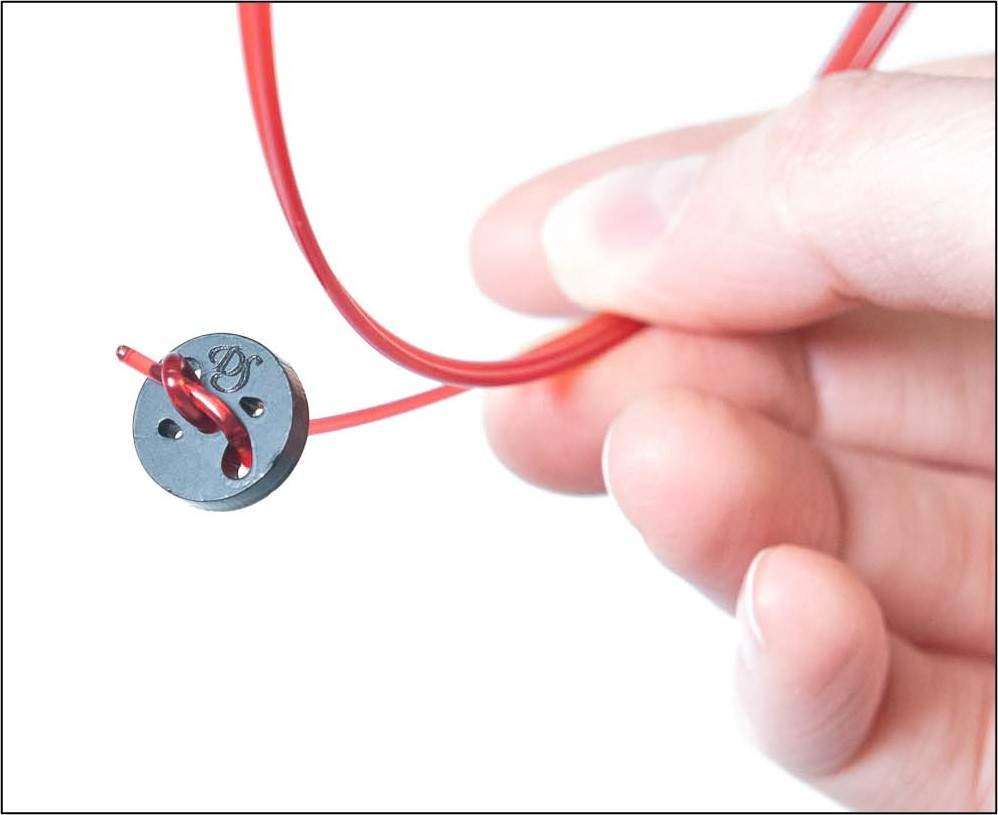
Another increasingly popular chromatic tuner is Clip On such as the Snark ST-2 like this one.  You can clip it onto the tuning key or onto one of the sound holes on the back of the harp (which can be a challenge to see while you’re tuning).  The microphone is in the clip, so they work well in noisy or quiet environments.  These are flexible and work well – just make sure you get the right (red) one – the others are for guitars and don’t have the response you need.  Same benefits and drawbacks as other chromatic tuners, but additionally even lighter, easier to carry, don’t need a pickup, and they’re just cute!

Finally, the last type of Chromatic tuner I’ll mention is a Phone App.  There are plenty of free versions for Android and for Apple.  I use gStrings but I don’t think there are vast differences between the available apps.  These work as well as your phone can hear (so, pretty well) and are easy to read.  Like the Snark, they have the same benefits as other chromatic tuners, the display may be more precise than your handheld (mine is at the single Hz so much more precise than my handheld) which can be good but may lead you to chase the pitch.  The benefits are enhanced by the ubiquity of the phone – if you’ve forgotten your tuner, you’ll probably still have your phone!  The don’t have a pickup so in a noisy room you may (or may not) be able to use it. 

Regardless of the type of tuner you select – a few more sage thoughts –

  • Having a backup is a good idea (and essential if you’re gigging).  You might consider carrying two different tuners.  In my gig bag I have a Korg, a Snark, and a tuning fork…and my phone – just in case.
  • No matter how good your tuner is, carry spare batteries!
  • Since your harp life is likely going to be long and you never know what kind of music you might be playing or who you might have the opportunity to play with, make sure your tuner can be calibrated (for instance you probably tune to A440Hz as a current convention, but you might move into other music that might have a different setting (like A4 = 432Hz)).  You might also look for other types of tuning – does your tuner have non-equal temperament such as Pythagorean?
  • No matter which of these you choose – practice using it!  The more you use it to tune, the better you’ll be able to correlate what the display tells you with how much to turn the wrench.
  • Finally – nothing beats listening.  It really doesn’t matter what the display says if the harp sounds wrong!  Be prepared to retune a string that sounds off.  Do that before you start playing!

I hope some of that was helpful.  What type or brand of tuner do you have?  Do you like it?  What does it do that you like?  What is it missing?  Let me know in the comments!


It helps to have a plan

What are you going to do this week?  It’s a fairly innocuous question.  But it has the potential to be a very good week.

But a little bit of preparation can ensure that it is a very good week.  All you’ll need is about 15 minutes and some paper. You can do this on whichever day is your night before your week begins.   You know that writing it down helps bring the thoughts out and makes them real. 

So, what should you capture there before you start your week?  Here are some ideas:

1. What would you like to accomplish this week? Try to be specific so you’ll know if you’ve done it.

2. Make a plan for each day.  Remember that you can include all the things that are part of practicing including analyzing new music, listening to tunes, practicing at the harp, practicing away from the harp, rhythm work, improvising, all the things! Don’t forget to plan which days youl might be away and have little time to practice as well as the days that you know you just really are not going to make it to the bench.  Be realistic!

3. Show up – every day.  If you have plan, it is certainly easier to stick with it.   

4.  Don’t waste your time – since you have thought about what you’ll be doing, do it – fully.  Don’t skate through your practice. 

5.  Be present.  Put your phone away, turn the tv off, close the door (if you have that luxury).  It’s a brief part of your day – be a part of it.

6.  Take the good with the not as good (and include the inevitable flow of your development into account when you plan your week. 

7.  Set your priorities – out loud.  You have already set them, whether you articulate them or not, so you might as well include them in your thinking.

8.  The clock is your friend.  Not only do you want to be sure to have identified when in your day you will sit to play, you also need to know how long you intend to play.  Not only do you want to avoid packing it in too early on a rough day, but you also want to keep the rest of your life going too!

9.  Make a note – when you’ve done for the day, jot down what you accomplished and what you need to do the next time (which might be a tweak to the plan).

10. Don’t let a little bit of structure make you forget that you enjoy this!

You might also strive to always play at the same time of day.  I don’t suggest that only because that I can’t really support that.  My schedule is never that regular.  If you have (or crave) a very steady schedule, then definitely do try to keep to a scheduled time.  But if it doesn’t really drive you, don’t worry about having a regular time – so long as you regularly make time.

Do you have a plan? Will you try some these?  Which ones?  Let me know in the comments.

Metronome – Friend or Foe?

While we’re used to thinking about our tools as our harp and the tuning wrench, we have other tools too.  Some we use more than others – electronic tuner, nail clippers, splines, music stand (and music) and more.  And then there are the tools we have but we resist using – like a recorder…or a metronome! 

Why do we resist using these tools?  Usually because we think (or we’re fairly sure) we’re not going to like what we learn when we use them.  It always feels like they are scolding us!

The metronome seems to hold pride of place as the most hated tool we have.  And I get that.  My parents gave me my metronome when I was a tween a million years ago when studying piano. It is a glorious wooden-cased Seth-Thomas.  But as much as I love that thing, I have hated it for years.   I was always late.  Or early.  Or just couldn’t get the subdivision right.   Or I was so busy  just trying to “hit the tick” that I’d forget to play.  And snaps?  Just wasn’t happening.*

Metronome Friend or FoeSo many mistakes – so very frustrating!

And I know I wasn’t the only one.  In fact, I’m writing this because one of you asked!  It is easy to feel like the metronome is not just a foe, but a diabolical one!

As “basic” as a metronome is, a lot of people don’t know how to use one.  And that’s exactly part of the problem.  After all it’s easy, right?  All of this will apply regardless of your choice of metronome.  Electronic or mechanical, they all do the same thing.

  • What is a metronome? A metronome is…(drumroll)… a glorified clock.  No, really.  Ok, actually it’s a simplified clock.  It measures time (that’s what “metronome” means).  Just like a clock – but in the increments you might need.
  • Why would you use one? A metronome is both regular and variable.  Regular in that it will beat out the tempo you set.  Variable in that you can change that tempo.  Typically, the tick represents a quarter note.  You can go slowly for laments (at about 40 beats per minute (bpm)) to reels (at about 125 bpm) to drum and bass (at about 180 bpm).  But more importantly, it helps you to be less variable.
  • How do you use it? The basics are, again, easy.  You select a tempo and play along.  Easy-peasy.  But it’s not.  My breakthrough came when I determined that I needed a tick for each subdivision rather than for each beat.  Setting the tick as a quarter note was confusing to me – if I was subdividing (counting in “ands”) then I needed two ticks per beat (a tick for the “1” and another tick for the “and”, a tick for the “2” and another tick for the and, etc.).  By adding these additional ticks, the metronome was ticking and tocking to match the way I was counting.  It also acts as a regulator so all of the tune is even.
  • When to use it? The best answer to when to use a metronome is – anytime!  But how you use it may vary depending on when you are in the music.  When you are just beginning and learning a piece, I’d suggest you don’t use it.  At all.  It’s too early, you’re probably barely hanging on to each note, the order they come, etc.  You probably don’t have the brain space to add that level of precision counting!  You can add the metronome in after you’ve gotten more comfortable with the music.  Initially you might use a slow tempo to assure you’re getting the rhythms right.  Once you’ve got that squared away, then you can gently increase the tempo to bring the tune up to speed.  In this phase, at the tender tempo, you can assure that the tune is even throughout, that the trickier parts aren’t slowing you down, and that the end and the middle are as strong as the beginning.  Then you can begin to approach the tempo noted.  Go up in small steps (one notch at a time on a mechanical or 2 – 4 beats at a time on an electronic) and as soon as anything is out of whack, slow down a little and approach the speed again (I go back 3 increments when I make an error).  This little bit of speed at a time ensures that you learn the tune rather than relying on momentum to get through it**.  Once you have the tune at speed, you can spot check your tempo on occasion to assure you have kept the tune the way you want it.

So, hopefully you can see that the metronome is your friend.  Even when it feels like it’s winning.  With the metronome (and any other tools you know you should use but keep avoiding) the more you avoid it the more you probably need it.  But anything that helps you gain clarity can not only help you grow but will do it as a friend (an honest friend!). 

What about you?  Is your metronome your friend or your foe?  How do you use yours?  Let me know in the comments!

* And in case you’re wondering, yes, I still have my beautiful wooden cased Seth-Thomas.  And yes, I still use it.  And yes do I love it – it always reminds me that my original fan club – my parents – knew what i was capable of, even when I didn’t.

** I tell my students to go back 3 increments when a-n-y-t-h-i-n-g is not right.  That includes a wrong note, a messed up fingering, a wobbly rhythm, a wonky phrasing, or anything that’s just not right.  The first reason is that you are doing this for you so don’t cheat yourself – expect your best.  The second is that you don’t want to keep practicing an error, so eradicate errors as soon as you identify them.  I guarantee you will not be able to perform the tune sooner by cutting corners!