Poetic License

Poetic License 

Hopefully you’re still working on those dynamics exercises. I say hopefully because they are challenging and if they are new to you, you probably aren’t all the way through in just a few weeks. And even if they are not new to you, the exercises I shared aren’t easy. They definitely aren’t a set of “once and done” exercises either!

I think I made a compelling case for why you would want to work on your dynamics. But just in case I wasn’t blunt enough, here I go again. We talked about music being a means of communication – you are telling a story. Not every story needs to be a soporiphic bed-time story, so we need dynamics to help carry the tale through its ups and downs.

Just like storytellers, narrators, or actors vary their delivery – we want to vary our own, in aid of the story we’re telling. We use those variations to help move our listener along with us. But we don’t want to just gormlessly vary our loudness – we need to be a bit more subtle!

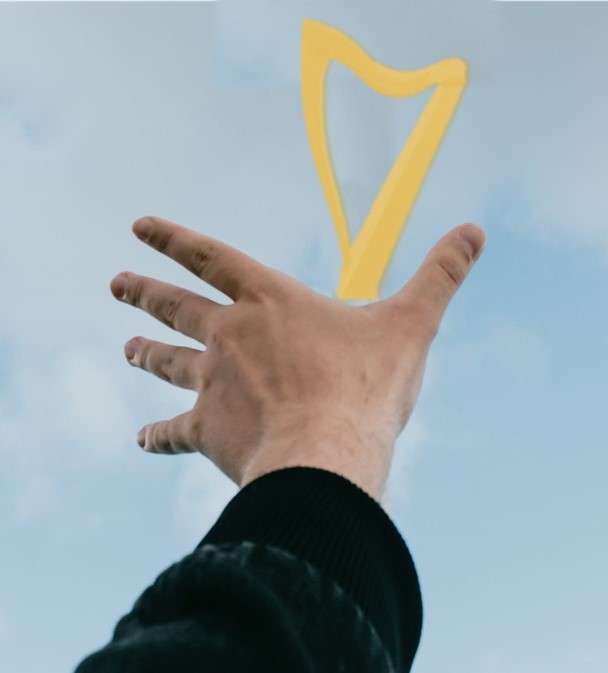
Another thing we can easily hear storytellers, narrators, and actors do is varying the pacing that they achieve through their breathing.  We call it phrasing (heck, they might too, what do I know?). And we can use dynamic changes to support the shape of the phrases on top of the breathing we are already infusing into the phrase shaping. If you’re not sure what I’m talking about let’s do a preparatory exercise before we go to the harp. Pull out your favorite poems! Let’s start with a limerick to warm up. These are goofy and sing-song-y and you know exactly how to read them aloud: da-da-da–da-da-da–da-DA, da-Da-da–da-da-da-da-DU, da-da-da-da-DA–, da-da-da–da-DU, da-da-da–da-da-da–DA! Really dig into the cadence. Read them repeatedly, emphasizing the sign-song nature of the rhyme. When you’ve reread a few times and really have the rhythm going, focus on how you need to breathe to support that cadence. Once that’s not a struggle, you’re ready to use that breathing to support varying the loudness with which you say each syllable. Notice how you make a curve shape with your breathing and loudness like this:

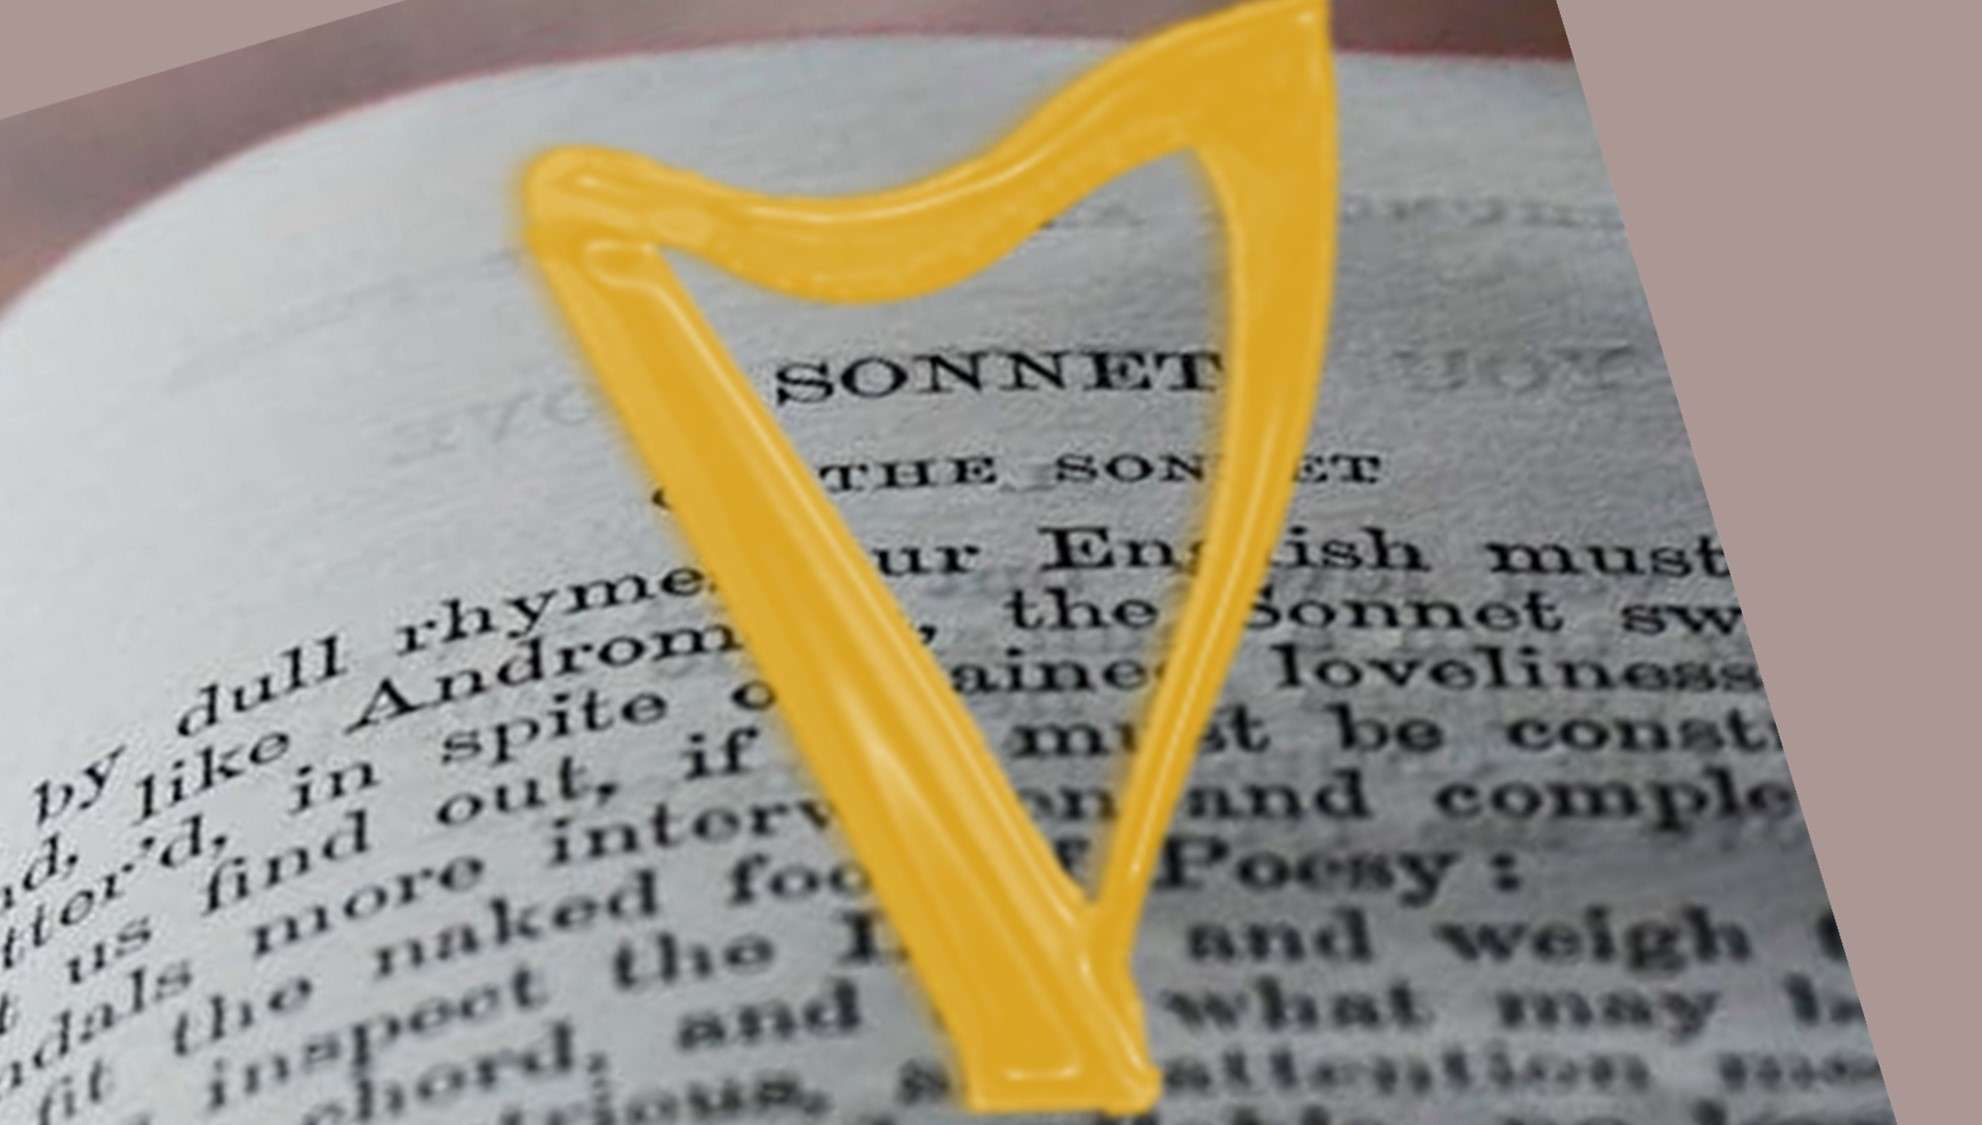
Once you feel like you understand this concept, move into other (more mature?) poetry – Browning? Hughes? Shakespear? Yeats? Choose your favorite (or pick the one you’ve never actually read (but would never admit to having skipped!)) and start reading aloud. Find the cadence, shape the phrases. Listen to the ebb and flow of your voice and its volume. Once you’re established in reading the poem, shift the loudnesses – if you need to, mark the page, and try emphasizing the typically unemphasized syllables and shout them out while only whispering the usually emphasized. How does that change how you hear the poem?

 Now, let’s turn the idea inside out and let’s mess with the poem! Read a poem out loud in a goofy way – read Byron as if it was a limerick or read the silliest limerick you can find as if it was a sonnet. Add an extra beat to iambic pentameter and make it jiggy! Do silly things to your reading to find different ways to present the cadence and rhythm of the poem and the breath and dynamics to get there.

After some excursing (both “serious” and “silly”), go back to your original interpretation and notice: has your breathing changed? How is your loudness varying? Have you had any changes now that you’ve thought of the words in different presentations?

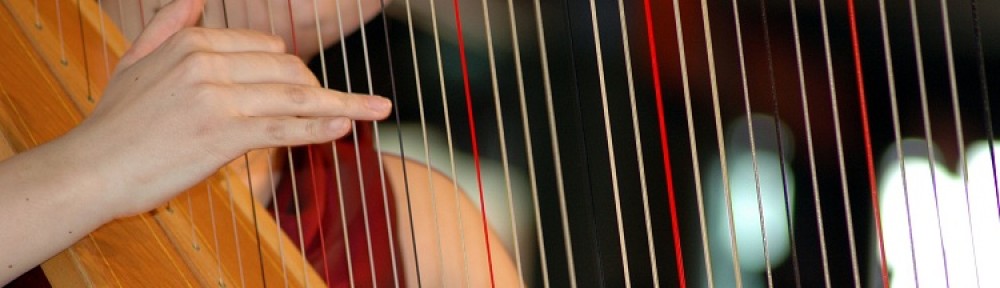
Now, go to your harp and do this same (sort of) thing – shape the phrases (like the graphic above) as you want to present the music. Now, make it into a “limerick”! For instance, play a 4/4 lament as if it were Katie Bairdie (or a 3/4 march as if it’s a jig). Take it from hushed to explosive! Then, go the other way and play a typically lively tune as a lament. Just mess around with it and see how you can shape the phrase to tell your different stories – and watch how the breathing and shape of the phrase change and how your volume control helps support that.

Clearly this is another set of exercises that aren’t “once and done” – you can do these exercises repeatedly and over time to explore all the corners of phrasing. Remember too that:

1. These are exercises. There’s no wrong. There is only exploration.

2. It is your story to tell. There is no wrong, only your interpretation.

3. They’re called dynamics for a reason! You can play the same sort of dynamic repeatedly and every time you play a tune. Or you can play a different set of dynamics each time you play. There is no wrong. It’s your story to tell your way.

4. Things change. Sometimes a tune always makes you feel the same things, no matter how many times you play it. Sometimes the tune leaves you feeling different, depending on how you experience it that day. There is no wrong – tell the story you hear.

I know this set of ideas is really different from what you might normally think of as harp playing, but give it a try and let me know what happens. What do you learn? What happens next (for you)? How do you think differently about your playing now? Can’t wait to hear your thoughts in the comments!

Turn it up to 11 – Redux

Turn it up to 11 redux 

Last week we talked about not playing ALAPATT (As Loud As Possible All The Time) and how you can enhance your playing by adding dynamics. How using dynamics help tell the story you mean to tell through your playing. We noted that if you want to be a better harper, you needed to work on dynamics.

Dynamics come from control of your hands and fingers. This control determines how your fingers interact with the strings. Expression (an outcome of dynamics) does not mean to play limply or weakly or barely or badly. Rather, we want the same rich, warm tones you get at full volume, but at different levels of loudness. You can do this!

Remember, this is not about playing louder or softer. Rather, it’s about controlling your fingers on the strings, learning how to get what you seek from the strings based on how you move. It’s a delicate dance between you and the harp strings. In this case – you have to lead! To gain this control, I want to give you some exercises that will allow you to focus on learning to control your dynamics. 

Let’s start by reviewing the dynamic markings. If you’re not familiar with them, they indicate the loudness for a particular section of music. These run from incredibly loud to incredibly soft (but still audible). The word for loud is forte (noted as f) while the word for quiet is piano (noted as p). There is also the range between them, and more letters indicate more (of that). So f is loud (forte), ff (fortissimo) is louder than that, and fff (fortississimo) is even louder still.  Likewise, p (piano) is quiet, pp (pianissimo) is quieter and ppp (pianississimo) is even more quiet, but still heard. Smack in the middle are mf (mezzo forte) and mp (mezzo piano) which are moderately loud or moderately soft.

There are a few exercises you can incorporate into your practice to get better at playing throughout your dynamic range so you can master your fingers and tell the story you want to tell. These exercises are not difficult and a few minutes a day will train your fingers and your brain to work together to get what you want. The focus of the exercises is to build differentiation between ppp and fff with clear progress through pp, p, mp, mf, f, and ff and to be in control of your fingers for each.

In control means that you play what you meant to when you meant to.This requires good technique with placing and closing, so if those are still something that you have to think about, then get that ingrained and then work on this.

Also, this is a relative continuum (meaning there is no absolute “loud” or “soft” only really really loud, really loud, very loud, loud, quiet, quieter, really quiet, and “what?”).

The exercises can be piggybacked onto exercises you’re already doing and I’ll use a scale as the example. I chose the scale because 1. I’m sure you’re already doing scales every day already (right?); 2. Scales are important, safe, and accessible to all levels; 3. You already know them, so you don’t need to spend a lot of cognitive energy on remembering the notes to be played which allows you to focus instead on achieving the dynamics; 4. you’ll quickly know when you don’t get the result you wanted/expected. 

Here goes:

Play one octave scale (up and down) in both hands at fff (as loudly as you can – while maintaining good form while staying in rhythm and tempo).

Now, play one octave scale (up and down) in both hands at ppp (as quietly as you can – while maintaining good form while staying in rhythm and tempo).

Third, play one octave scale (up and down) in both hands starting at fff, then repeat the scale each time starting at a progressively quieter dynamic (so fff, then ff, then f, mf, mp, p, pp, ppp. Each time through is a different dynamic). Yes, that is 8 times through the scales with graduated volume.

Next, play one octave scale (up and down) in both hands starting at fff, and subtly shift through fff to ff to f to mf. This takes a little planning – decide before you start to play where you make the shift – and how you will do that! Move it around a little and have some fun. For instance, you might do most of the scale fff and “downshift” to mp in the last 3 notes. Or play every two notes at a particular level. It’s up to you – the important thing is, did you get what that you expected? Don’t forget to do the other side and play your one octave scale (up and down) in both hands starting at ppp, and subtly shift through pp to p to mp.

Once those are easy(er), you can really shake it up.  Rather than moving gradually from one dynamic to the next, adjacent dynamic, make big leaps!  Maybe go ppp to ff to mp to fff, etc.  You get the idea – big changes…just like you’re playing music!

Go slowly and carefully at first. Each time you learn something new you need to give yourself time to process it, think about what you’re doing, what’s working (and not working), make changes, experiment, and learn. Give yourself time for all that! Make your own variations – rather than playing both hands together play from one to the other (for example – fff from left hand up an octave to right hand for another octave and down at ppp or something else that challenges you a little bit but doesn’t stop you from learning).

When you are able to successfully do each of these, then do the same exercises but make the movement between loudnesses larger across multiple octaves. At first make really big adjustments from fff to ppp at the crossover or vice versa. Change up which direction you go (loud to quiet or quiet to loud). The point is to test your control (and decision making).

Just about the time you think you’re big and bad and hard to diaper, it’s time to do the really challenging exercise. Because real control will be having different dynamics in each hand – a quiet base line under a loud melody. Or a shift of the melody to the lower register (and in the left hand) with a quiet harmony in the right hand. Remember the idea is to control your hands and make good decisions.

Here we go – Play the bottom of the octave only (e.g., C-D-E-F (up to but not through the cross) in each hand. Select which hand will play fff and which will play ppp. Give it a go. Now, this is much like when you first tried contrary motion – you might feel like your fingers are connected to someone else’s brain! Just breathe and keep on. You want to have each hand doing its thing (now you see why you have to practice!). And when you are feeling pretty confident on this, then do the whole octave up and down.

If it doesn’t seem to be coming along, try letting one hand come ever so slightly before the other so that you’re in control of each finger. Breathe. Relax. Work them closer and closer together until they’re simultaneous. This is hard – don’t rush it. When you think you have it – make a video to assure that you’re not getting tense (and that you’re keeping the dynamic distinction between hands consistent).

Important things to keep in mind (especially when it isn’t going swimmingly):

  • Progress not perfection.
  • This is about control not volume.
  • Whatever leaves you thinking you’ve had enough and can probably get by without is exactly what you most need to work on.
  • It will be worth it – when you bring tears to a listener’s eyes…and they’re not from painful eardrums!

Remember that even fast tunes have a story (of some sort). If you want to tell the story of a frenetic rave + chase scene from a video game, then by all means, keep thrashing away. But if you’d like to tell a more subtle story (Battle of the Somme or Flowers of the Forest anyone?) use your dynamics and tell it!

I’d love to hear how you get on with this – let me know in the comments! If, after reading this, you are a little lost, let me know that too – and we’ll work on it. And if you have other approaches, let me know!

Turn it up to 11

Turn it up to 11

Did you know there are apparently four musics of the harp? They are Goiltai (for crying), Geantrai (for cheering), Suantrai (for sleeping), and Thrashai (for being heard over any other sounds present on the earth). (ok, I might have made up that last one)

Have you ever noticed how many people play their harps like they are auditioning for the Scorpions or MegaDeath? It seems as if playing as loudly as possible is their only goal. Now, I get it. You sit behind the instrument, and it is designed to project in front of you so you really might not be able to hear how loudly you’re playing. And if you sit in enough sessions between the other instruments, you could be forgiven for thinking that thrashing away at the strings is the best possible way to get out there.

But ugh – stop! Whacking away at your poor strings is not what you need to get better at. If you really want to join a death metal band, buy an (really big) amp.

If you want to be a better harper, work on dynamics.

Dynamics are an easy way to differentiate your playing, bring musicality to your music, and help your audience to know which of the three musics you’re trying to convey. Dynamics allow you to play at varying loudnesses. There are two major parts of adding dynamics to your tunes – storytelling and technique. Let’s start with the easy one this week.

Storytelling is essential to your playing. Remember that when you play, you are communicating with your listener (even if the only listener is you). For each tune, you’re telling a story. For many laments, airs, and songs there is a specific related story or tale. For others there isn’t (or the story has been lost, or you just haven’t heard it). When you play, you’re going to tell a story – whether you mean to or not. Might as well tell the story you mean to (even if you have to make it up).

The story you convey will be put forth on the tune and will be told through the tempo, the rhythm, the accompaniment, and the dynamics! So having some (dynamics) is a great place to start. If you doubt what I’ve said, I refer you to Prokofiev’s Peter and Wolf a very easy example of this point.  But also, Holst’s The Planets or Tchaikovsky’s 1812 Overture * or Muse’s Uprising as other easy examples. **  When you listen to these pieces you can quickly hear how much the dynamics support the story being told.

You can do that!

When you’re preparing a piece of music, think about the story you want to tell and how your dynamics will help you tell it.

How? (you already know what I’m going to say….)  The way to get better at varying dynamics is to practice. Next week, I’ll share some exercises you can incorporate into your practice to develop your dynamics!

If you have tips or tricks for playing dynamically, I’d love to hear them – let me know in the comments!

The Hand Trap

The Hand Trap –

Aren’t we fortunate to play with two hands?  When you look at them dispassionately, they are pretty cool – mechanical artwork that also bring joy (by which I mean they bring cookies to your mouth…oh, and they help you play too!).  But for good or bad, there is also a hand trap.

That trap exists in the roles we assign to each hand as we play.  You know the thinking – the right hand takes the melody while the left hand provides the “color commentary” of harmony.  But that thinking can be really limiting.  And it creates a box (read: trap) that can be hard to get out of. 

The box is complicated and has at least three faces (it’s a metaphorical box!) which are interrelated – musical, physical, and mental.  If the hands get trapped in one (or more) that will curb the potential to do amazing things. 

What are the sides of the trap?  Musical, Physical, and Mental.  What are those limits?  How about:

Musical – using only one hand for melody may artificially bound what you play.  And the same could be true for the harmony you generate as well.  In addition, each hand has its strengths and weaknesses and keeping each role confined to each hand closes off options for the other.  The other impact of sticking to specific roles is that you may not make use of the whole harp.

Physical – We can start by going back to those individual strengths and weaknesses.  These will impact your control, power, and balance of each hand as well as your speed accuracy, and confidence.  As above, keeping the hands assigned to roles makes it more difficult to use the entire range of the instrument.

Mental – holding the music separately in your hands will impact how you think about it and potentially change how you might think about it.  This self-limitation may prevent you from identifying and using elements of your creativity.

It would be a shame to allow a rigid adherence to “handedness” limit your musicality and trap you into playing everything pretty much the same way.  Changing things up can help you expand musically, physically, and mentally by helping you develop more strengths and become more flexible.  It’s worth a try!

Like every change, if you decide to try to make a move, give yourself time to work through the kinks.  The first time you try something new it might go well – or it might run off the tracks so fast it makes your head spin!  So go slowly, carefully, thoughtfully, and gently.  An easy way to start is to play a simple tune you already know with your left hand.  Don’t worry about harmonies or tempo – or anything really.  You just want to muddle through the tune until it becomes easier (aka practice!).  Once you’re comfortable, then you can try playing the melody in both hands together.  After the melody is solid, you could then transition to putting the harmony in the right hand (after all, the left hand’s got this).   And just like that, you’ll have pulled a switcheroo!  All the while, you’ll probably learn more about the tune, how you think about it, and how you present it (which might change how you approach it…and you can see a whole iteration starting just by switching hands!). 

Make it easy on yourself.  You could start with something like Frere Jacques or Katie Bairdie.  Once you’ve done it once, each subsequent trial will be easier. 

What do you think – are you willing to give it a try?  I’d love to hear what you get up to – what tune did you try?  How’d it go at first? Are you going to keep at it?  Let me know in the comments!

Being Musical-y

The president of my fan club doesn’t know much about music but sometimes lofts the question, “how is your musical-y thing going?”.  It’s meant to demonstrate support and caring.  It’s sweet…not helpful, but sweet.

“Musical-y thing” in this context means “everything” …and everything is a lot of stuff when we’re talking about music.

Be musical-y

But we are musicians and so we should understand what makes up the musical-y stuff.  We need to know the difference between and the relationship of the musical-y things.  They sort of easily fall into two elements – Musicianship and Musicality*.

Some people think they are the same thing, but they are actually very different.

Musicianship is the technical stuff – the playing, articulation, fingering, accuracy, closing, good reading, good posture, thinking, incorporating technical elements into your playing, etc.  Musicianship leads to strong playing.  Musicianship fuels analyzing the music to find the patterns, the themes, the work arounds, and applies all that technique to result in solid playing.  Musicianship is the hard work, the repetitions, the focused practice – the discipline. 

Musicality is the expression, the emotion, the feeling, the inflection.  Musicality hears the potential in each phrase, each pattern, each mis-note**.  Musicality is the recasting of the phrase, the on-the-fly improvements, and adds that sparkle to the performance.  Musicality injects the life into the music.  Your listener can feel your musicality.

Musicality is the life of the party while Musicianship is refilling the dip.  Without Musicianship, Musicality (and everyone else) leaves early.  These are both essential to having a great event!  And frankly Musicality is so much easier to bring forth when it’s leveraging strong Musicianship.

Developing each of these is essential to continued growth but that can be a challenge.  For some, the focus is on musicianship – those very technical things that can be measured, assessed, built incrementally, and tracked.  For others, the focus is on musicality – the feelings expressed and the connection with others – things you can feel but can’t necessarily point directly at to assess.

If you have fallen into the trap of focusing on only one, dig your way out!  Why?  Because no one ever said, “I love rote, mechanical, robotic music”.  But also, no one ever said, “Despite almost every note being so wrong that I didn’t recognize the piece, I loved the emotion of whatever that was.”  These are two sides of the same coin – musicianship without musicality is flat and uninteresting.  Musicality without musicianship is just about noise.  To be a complete musician, you have to capitalize both!

You can develop each – but how? (You already know what I’m going to say) Practice!  But balanced and complementary practice. 

To develop Musicianship, do the “usual” practice – careful, precise work.  Deliberate practice of the technical elements applied to your tunes.  Focus on the skills.  You know how to do this.

To develop Musicality, do the “unusual” practice – craft the story you’ll be telling by visualizing the elements, hear the emotions you want to evoke, yep – use your imagination!  Use movement to reinforce your story.  Calibrate your finger control, position of your hands, and placement of your arms so that you evoke the sound you are imagining.  And because it’s hard to do all these things at once and assess the outcomes, record yourself, find what you like, and build on that!  In addition, write down your ideas, thoughts, and insights as you practice.

Here’s a homework assignment – select a new-to-you song (songs are easy – they have words that tell you what the story is – easy-peasy!).  Learn the tune with good technical proficiency (strong Musicianship).  When you are comfortable playing the melody, think about the story and its associated emotions so you can craft your playing and – bake that feeling into your tune practically from the beginning (Musicality).  Keep testing for doneness (make throw away recordings) and monitor your technique (which can so easily fall by the wayside while your brain is trying to focus on everything).  Remember it is never finished, so you can change how you feel about the emotions you seek to evoke at any time!

Are you musical-y?  How do you feel about your musicianship and your musicality?  Have you tried this homework?  Let me know what you learned in the comments!

*Yes, of course there can be more or different bins – be my guest, tell me a better way to characterize this!

**Some people call a Mis-note an error but that would be a mistake 😀

What’s this thing do?

When you’re learning a tune, it’s really easy to know what your right hand is going to be up to – after all, it pretty much completely owns the melody.  But the left hand? Sometimes you’re left wondering what’s this thing do?

When you learn a tune, if you’re given an accompaniment, you’re set.  After all, what do you get when you are given an accompaniment? In modern parlance, you get a

“curated set of harmonies that perfectly compliment the melody”

Of course that’s a little tongue in cheek, but you do feel like you get a free pass because someone who “knows” has put it together.  As long as you play it correctly, you will be “right” (whatever that means).  No argument.  No guff.  After all, some acknowledged shining light has written it, not you.  No one will gainsay you. 

And that’s such a safe and comfortable place. 

What's this thing do?Because once you’ve learned that left hand and “perfected” it (whatever that means), you have a whole package, and it can be incredibly challenging to break out of it. 

It might be a trap.  Safe and suffocating share too many letters!

But what if you only get the tune itself and are left to fend for yourself for the accompaniment?  Then you really will be asking what to do with that left hand!  And that probably feels really uncomfortable.  So, what should you do with that left hand thing?

Well, you know you could just lay your hand on the sound board and wait for the tune to end.  That would be weird.  And possibly boring.  So, you might feel compelled to fill the space with sound.  And that’s an idea.  But let’s think about it for a sec – what does filling the space with sound from the left hand do for us? 

It makes us feel comfortable.  Most people are ever so slightly scared of silence.  Ok, many are deathly afraid of silence.  So, we throw a bunch of notes into the air and expect that to act like a sort of sonic weighted blanket. 

It makes us feel better.  We all know that if the right hand is going, it will be more challenging to keep the left hand going (especially initially).  But most of us are always comparing ourselves to others and we seem to be inclined to find ourselves wanting.  Putting up a bigger sound fence is more challenging and so we can be content that we’re better at playing.

Do we need to fill up all that space?  Probably not.  A very wise teacher told me years ago,

“The Melody is what’s important!” 

The rest is, as they say, just details.  The accompaniment is ancillary.  There’s a reason it’s called an accompaniment after all.  So, we need to press that left hand into the service of the melody rather than hoping to make it so spectacularly mesmerizing that no one can actually play it!

What does service to the melody look like?  Well, it might be:

A simple set of supporting tones.  When I say simple, I mean simple – single notes, light and broken octaves, tenths, or fifths? Simple. And usually beautiful – you do play the harp after all – use it!

The chords of your choice – blocked, broken, rolled, arpeggiated, unstructured – up to you.

Big fancy countermelodies – variants and shifts around the melody can be a nice accompaniment.

Lending a hand – sometimes the left hand can lend a hand to the melody taking a note here or there to help the right hand render the tune better, faster, stronger.

Combinations of those – a little variety is helpful to maintain the interest of the player and the listener.

When you’re putting your ideas together, have the left hand do those things that –

Can actually be done – don’t craft a left hand you cannot actually play! (don’t ask me how I know this)

That enhance the melody – make your accompaniment like a delightful perfume not a cloying cologne!  It should be just enough to keep your interest piqued and not so much as to be repellent.

Don’t steal the show – if the only thing your listeners remember when you’re done is that flashy left hand, you might not consider that a success of sharing the melody.

Help the melody convey the story – one of my favorite exercises is to play a tune and change its tenor via the left hand.  Try it!  Make a “happy” tune “sad.”  Or make a “sad” tune “pensive” then “hopeful” and then try to invoke a crying jag.  It’s up to you what the story is, but your left hand can help you be in control of it.

No matter what you decide to include, ensure that the accompaniment acts in service to the melody – that it improves, impels, or increases the melody.  Because that’s what that thing does!  What do you do with this thing?  Let me know – I’m always looking for ideas!

Do You Count? 

I often think about tunes in “layers”.  All the layers are important, but some are easier to master than others.  The layers include the notes, the fingering, the phrases.  And then there’s the counting.  There are loads of elements that define the music, but time might be the most challenging to really get learned and honed – to get right. 

Do you Count?

When you get to brass tacks, music is really a sequence of sounds and not-sounds (rests) over time.  And so, to be true to the melody, share the message, and communicate with our listeners, we have to keep the count.  

Sometimes, as harp players, we become inured to the silence – we get so little of it with our wonderful resonant instruments. Harps love to keep on playing and that lovely sound “hanging around” may make us lazy – it may feel like it will be easy to get away with not counting.  But that is an illusion.

Counting can be a challenge when you first begin to learn a tune.  There is so much to learn and all of it important.  We have to keep the important stuff in mind – actively use it.  Time is challenging but it can be so rewarding!  It will help your audience follow your message, it will make playing with other musicians a greater joy, and it will help ensure your tune is what the original composer meant it to be.

Previously, I have said that I don’t advocate rigid adherence to the beat.  That wasn’t really accurate.  Rather, it is essential to know that timing of the piece and work within that.  With poignant airs you might bend the time to build the expression, but that works best by manipulating the times. Laments need to be sorrowful, but it should never be lamentable!  But the difference will be in how you deal with the time. 

It is essential that you learn to count.  Ok, I know you can already count.  You have to learn to count while you’re playing…and keep counting, maintaining your counting throughout your playing. Only when you have mastered this tool of communication can you begin to modify its application as appropriate to tell your story.  I know counting can be hard – it’s one more thing to do while you’re also trying to remember what notes come next, which fingers to use, that you need to breathe, etc.  Pesky layers!

So how do you add counting to that task?  Carefully.

First, start slowly.  This really is another task you will have to perform while also doing all the other things you have learn. Counting is another thing you have to think about as you bring the tune together – make sure you go slowly enough that your brain can keep up!

Second, practice.  Counting while you’re playing takes practice.  You want to practice counting enough that it becomes automatic – no matter what you’re playing or where you are in learning it (just starting, polishing, anywhere in between!).  One method I suggest is to include this in your practice away from the harp.  An easy way to practice is while you’re walking or running.  This gives you a physical beat to follow so you can work on counting.

Third, be consistent.  You can’t practice counting the tune once and be done!  Make practicing counting a regular part of your practice.  If you really are not counting at all – start with simple tunes you already know.  As it gets easier, move on to more challenging tunes and tunes you are learning.  You will get better!

Finally, always be working on it.  Once you can consistently and accurately count, start making things more complicated and related to other music.  Remember to count to the smallest note value (e.g., the eighth notes if they’re present or 16ths – you will have to do some analysis).  Use whatever counting device works for you – vocables, fruits and veg – whatever works!

Of course, there’s (always) more to the story, so send me your questions and share your insights in the comments.  In the meantime, stand up for your music – make sure you count!

Power tool

As musicians, we use all kinds of tools.  This, of course, includes our harps (duh!) and our tuning wrenches. But there are plenty of other tools we use all the time.  Don’t believe me? What about your practice journal? Your metronome (yes it counts, even if you barely use it!).  Your electronic tuner?  Pens, pencils, sticky notes, highlighters – all tools.  Books and books and pages of music?  Also tools.  But perhaps the most useful tool is one that can help you learn, improve, and focus.  What is this magic power tool? 

Your phone!

Yup, your phone really can be a life saver (well, practice saver at least).

No, not for watching videos (although that’s a good way to learn new tunes).  Not for surfing Facebook.  Not to check the weather, be a Twit, or to surf up irrelevant factoids.

I’m pretty sure there are two things my students can hear me say before the words can actually get out of my mouth.  The first one is: SLOW DOWN!  You might be tired of me saying that too.  But I repeat it because — it’s true.

The other one they know is coming is: RECORD YOUR PRACTICE!  Use your phone camera to record yourself. 

I know that often, no one believes me.   But every once in a while, I hear back from someone, “Oh!  You were right!  I didn’t know I was [insert your current technique foible (sticking out my pinky, not bringing my 3 back in, actively making roach antennas, not actually placing, etc. the litany is long!)] but I really am – I thought you were just being mean.”

This is, of course, a variant of, “Oh, I didn’t know I was slowing down/not waiting/not counting/consistently playing the wrong note” that arises as well.

It is really important to acknowledge that there is a lot going on when you’re playing a tune.  You feel this keenly when you’re learning a tune (when even an 8-bar romp seems to last forever, none of the notes will stick together in clumps, and you are sure you’ll never learn it).  But once we get past the initial feeling of fear/dread of having to think about each note, we think we got it. 

But we don’t.  Mostly because there is so much to get – fingeringandplacingandtoneandharmonyandpostureandbreathingandeverythingelse

What you lose – almost immediately – is the ability to monitor yourself!  There are so many things to think about and you can only pay attention to so many. 

And that’s where your phone comes in – set your phone up on your music stand (obviously point it at your “work area” of the harp – at the strings where you are playing).  Make sure you use the video function rather than the still camera.  Then push the button and let it go. 

Don’t worry about making a huge video – you’re going to record– review–delete.  After you have recorded, then you’ll review – watching for what you can learn.  Following reviewing, you can then delete that file (or upload it for your teacher) and start the process over again.  Make sure you record with sound so you can hear the tune (and the metronome!).

What are you reviewing for?  Well, the list is long and distinguished!  You will probably need to review it a few times to catch everything.  You’re looking for closing, placement, good contact with the string (or getting enough finger on the string), no hesitations, relaxed hands, appropriately raised elbows, no grimaces, etc.).  And you are looking for places that you fumble*.

You won’t record your pieces just once.  You can repeatedly record when you’re learning the tune (as above).  Later, when you’re more facile with the it, you’ll be looking more at the musicality with which you’re delivering the tune – still fingering and placing but also dynamics, phrasing, accents, and those places that sounded good in your head just don’t sound as good in the real world.

No matter which stage of learning you are in with a tune, you are also looking for the places that you need to focus your work.  The tricky fingering not working?  Focus on just that bit, work it over until you figure out a new fingering and a better way to do it.  Then you can append the bit just before (coming into the tricky bit) or just after (coming out of the tricky bit) and build up a larger and larger chunk of the tune until the whole thing just works.

Have you tried recording your practice?  Want to share what you learned in the comments?  I’d love to hear about it.

*I classify fumbles into two buckets, each of which has a different solution.  The first bucket is “I had no idea where to go next”. The solution there is to review the tune and keep working on it because you don’t have all of it in your head yet.  The second is “I knew exactly where I needed to go, I just couldn’t seem to get there”.  The solution for this bucket is…SLOW DOWN!

Stay between the lines!

I was driving down the highway the other day. I was going about 1000 miles, so on one particularly long, straight stretch, I started remembering when I learned to drive.

For me, one of the hardest things to learn was staying in the middle of the lane. When you start to drive, you know you need to stay in the lane – and between the lines. The lane is defined by the lines, so I looked at the lines – constantly. But you know how that goes – the more you look at the lines, the farther you are from your desired position – in the middle of the lane. The best advice (or training) I got was to look down the road – look way down the road. After I (finally) learned that, staying in the lane was so easy. Now, as an experienced driver, I don’t even see the lines close to me and keeping the vehicle in the middle of the lane is something I take for granted.  It seems that I just go where I meant to be.

The reality is, no matter how good a driver you are, you will never stay in your lane to get where you’re going if you don’t look ahead.  So, what does that have to do with playing the harp? Everything!

When you’re learning a new tune – what do you do? I don’t know about you, but when I’m having trouble getting a tune into my head, I naturally narrow my thinking down to just what comes next – what’s the next note. But this doesn’t actually help me learn the tune. It just frustrates me (thus drawing my focus away from what I’m trying to do – learn the tune). If I lift my head and keep my focus “down the road”, then I can think of the phrases (as phrases, not as a trickle of sounds). When I can hear the tune in my head, the notes that come next become so much easier to remember.

When you’re reading music, the notation (the lines and everything else) are helpful – but can be distracting. Again, sometimes just having all that ink only serves to draw your attention to the individual blops – and you lose track of where you are on the page, in the phrase, in the music. When you lose your place, your hands may not end up in the right place, or they might be going the wrong direction or be overstretched! Keeping the long view will allow you to read the music rather than focusing on the ink and better allow you to be more able to play.

When you’re playing, you have learned the tune or become familiar with the dots on the sheet. When you’re playing, you want to be “in the moment” – and that is important. But remember that music isn’t static or fixed.  Music is serial, it comes out over time – like the road!  It can’t come out all at once (although there are some composers who clearly do not agree with me on that!). So being in the moment has to include the plans for this moment, and then for the next moment, and then the following moment, and on and on until the end of the piece – as a flow. This is not contradictory, rather, you need to hold the music in your head as a piece rather than as a set of notes. Looking at the whole of the music, rather than on just it’s representation (that you learned or are reading), will help keep you on track.

When you’re performing, you really are taking all that you have learned and putting it out there in the world to share. This is more than just playing in that now. Because now, in addition to being in the moment with the music, you must also be present with the listeners. Whether there are 2 or 200 or 2000 in the audience, your focus has to be “farther down the road” to include not only the music but also the hearers and what your message to them/with them is. Here, your long view includes them, the music, and the presentation.  Keeping an eye on where you want to take them with the music, what it is you want to share, and how you mean to do that will help give you a smooth ride.

Of course, this is a simple analogy.  There are many things on the road that require attention (like stop signs, traffic, pedestrians, etc.).  And just like that, music (written or aural, practice or performance) has details (like dynamics, tempo, timbre, etc.) which enrich the ride and improve the experience.  But, just as staying between the lines becomes second nature, learning, reading, playing and performing can also become second nature so that your music grows, flourishes, and delights. And just like any journey, when staying between the lines comes naturally and effortlessly, you can enjoy the journey so much more easily. What are the lines you have a hard time not looking at? How do you stay in the lane? When you look down the road – what do you see? Leave me a comment and share how you do it!

Give it a rest!

There are so many things we can do with our harps to make a noise – typically beautiful, but not always. And there are all the effects – from bowing the low strings to PDLT to damping to glissing – we have all kinds of ways to disturb the air and get sound.

We each spend time practicing our favorite sounds. Or those required by the score (Bernard Andres comes to mind quickly, but there are others…). We might even spend time actively seeking out new noises to make from our instruments or perfecting our technique to assure we get the effect we meant (harmonics come to mind). We work hard to get noises from our harps.

And of course, we spend a great deal of time learning to play so that we know exactly how to touch our instruments, so we get what we wanted – beautiful tone, deep, sonorous chords, compelling melodies, captivating harmonies.

But there is something else that we should practice that will enhance all this. We always let this get by us, and yet, it is often the secret sauce that really “makes” the tune. It allows the audience time to reflect. It gives you a space to think. It helps insert life into the tune. And it seems to terrify so many of us.

What is it that we’re so afraid of?

Is it a technique that is difficult to master? Nope

Is there some “signature composer” that we should have already thought of (but we haven’t)? Nope

Is it some advanced riff that only the best musicians get? Nope again.

It’s the magical, useful, and all too undervalued rest.

You know – silence.

The space b-e-t-w-e-e-n the notes. The ones you might shave in the fast tunes (which is why you end up playing faster). The ones you wish you didn’t have so many to count in ensemble. The ones that can completely make (or break) your competition air. The ones that, when used appropriately, get your audience right where you want them, in the moment, with you.

Why do you need to practice your rests? Well, mostly so you will be comfortable – with the silence. We often “clothe” ourselves in the protective wrapping of notes. We think that we will be protected if we have the notes or that we are vulnerable and exposed in the space between.

How about you turn that thinking on its head. In fact, the rests are the most free part of the melody. Rests add a strength to the harmony that the sounded notes cannot. And they give you a little bit of a breather.

You already know how to make a rest. You just don’t play (or you also damp). And you don’t play for some finite amount of time (as described by the music). You create an absence of sound. You don’t generate any sound.

Of course, as you practice a piece, you would generate a rest if required by the composer in the piece. But, there are other useful times for silences – between pieces? Under thunderous applause? When you want to get the attention of the audience?

So, how really do you get comfortable with rests? Especially the long ones. Because, contrary to popular belief, that is not time made available by the composer so you can fidget! That’s true whether it’s a 16th rest or a thousand bars of rest in an ensemble piece. No matter how long or short, you need to wait, be quiet, and be ready, but not overeager, to come in.

Short rests are relatively easy to practice because they are a direct part of the melody.  You can practice them with your metronome, just like every other element of the music.

For the longer rests, between tunes or to create a mood, here’s a suggested practice element.  This can help you become more consonant with the emptiness of the rest. Use your watch (but only sparingly).

One of the most difficult things to do is to estimate how long you have been sitting, making silence. I had the opportunity to play for a meditative event. In this playing, it is important to leave a little space for thinking, praying, and contemplation.  So, the rests become ever so much more important! A full minute is not too long to wait. I actually used my watch.

And learned something so important – when I had finished a tune and was waiting to begin the next, I had thought, “oh crikey, I better get going or they’re going to think I’ve fallen asleep.”

Watch check – 18 seconds. What?!? Only 18 seconds? It felt like a week.

I was aiming for 90 seconds. It felt like forever had gone by. Boy was I wrong!

After that, I start practicing estimating the amount of time that had passed since the end of the tune. (Reality check – to you the tune might end when you start to play the last chord, but to the audience, the tune ends when they can’t hear the lingering reverb any longer (or you complete your gesture) – which could be a while!)

My hack for estimating time – because it’s rude to check your watch over and over – is to sing the Birthday Song in my head.  It takes about 10 seconds to sing (don’t rush it just because you’re not singing aloud). I breathe. I position (and then check) my fingers when I’m ready to play again. I don’t rush. Want to leave a minute? Sing the song six times through.  To get 90 seconds sing it 9 times.

This ability to “tell time” without telling time will also make your presentation easier on your audience and on you. You can assure you leave some “breathing room” between your tunes.  When you are not in a rush, you are more present which makes your music more lifelike and fuller. And what’s not to like about that?!?

So, incorporate full rests (no shaving of note value) and waiting rests (silences between) into your playing and Give it a rest! How do you make space for the silences?